本文最后更新于:2022-02-12T14:59:28+08:00
mavon-editor的基本使用
mavon-editor是一款基于Vue的Markdown编辑器,可以在前端展示Markdown的编辑界面并完成相关的编辑操作。接下来介绍该组件的基本使用方式,包括组件引入以及组件使用。当然在使用之前,需要进行安装,安装指令如下:
1
| npm install mavon-editor --save
|
1. 组件引入
1.1 在vue-cli工程中引入
在main.js文件中进行全局注册:
1
2
3
4
5
6
7
|
import Vue from 'vue'
import mavonEditor from 'mavon-editor'
import 'mavon-editor/dist/css/index.css'
Vue.use(mavonEditor);
|
1.2 在nuxt-cli工程中引入
首先在plugins文件夹中创建js文件vueMarkdown.js,里面填入以下内容:
1
2
3
4
5
| import Vue from 'vue'
import mavonEditor from 'mavon-editor'
import 'mavon-editor/dist/css/index.css'
Vue.use(mavonEditor);
|
之后在nuxt的配置文件nuxt.config.js中引入插件:
1
2
3
| plugins:[
'@/plugins/vueMarkdown',
]
|
2. 组件使用
引入完成之后,就可以以组件的形式使用,使用标签<mavon-editor></mavon-editor>即可。
1
2
3
4
5
6
7
8
9
10
11
12
13
14
15
16
17
18
19
20
21
22
23
24
25
26
27
28
29
30
31
32
33
34
35
36
37
38
39
40
41
42
43
44
45
46
47
48
49
50
51
52
53
54
55
56
57
58
59
60
61
| <template>
<div>
<mavon-editor
ref="md"
placeholder="请输入文档内容..."
:boxShadow="true"
style="z-index:1;border: 1px solid #d9d9d9;min-height:550px"
v-model="content"
:toolbars="toolbars"
@save="saveMd"
@imgAdd="handleImgAdd"
@imgDel="handleImgDel"
></mavon-editor>
</div>
</template>
<script>
export default {
name: "target",
data() {
return {
content:'',
toolbars: {
bold: true,
italic: true,
header: true,
underline: true,
strikethrough: true,
mark: true,
superscript: true,
subscript: true,
quote: true,
ol: true,
ul: true,
link: true,
imagelink: true,
code: true,
table: true,
fullscreen: true,
readmodel: true,
htmlcode: true,
help: true,
undo: true,
redo: true,
trash: true,
save: true,
navigation: true,
alignleft: true,
aligncenter: true,
alignright: true,
subfield: true,
preview: true
}
}
}
}
</script>
|
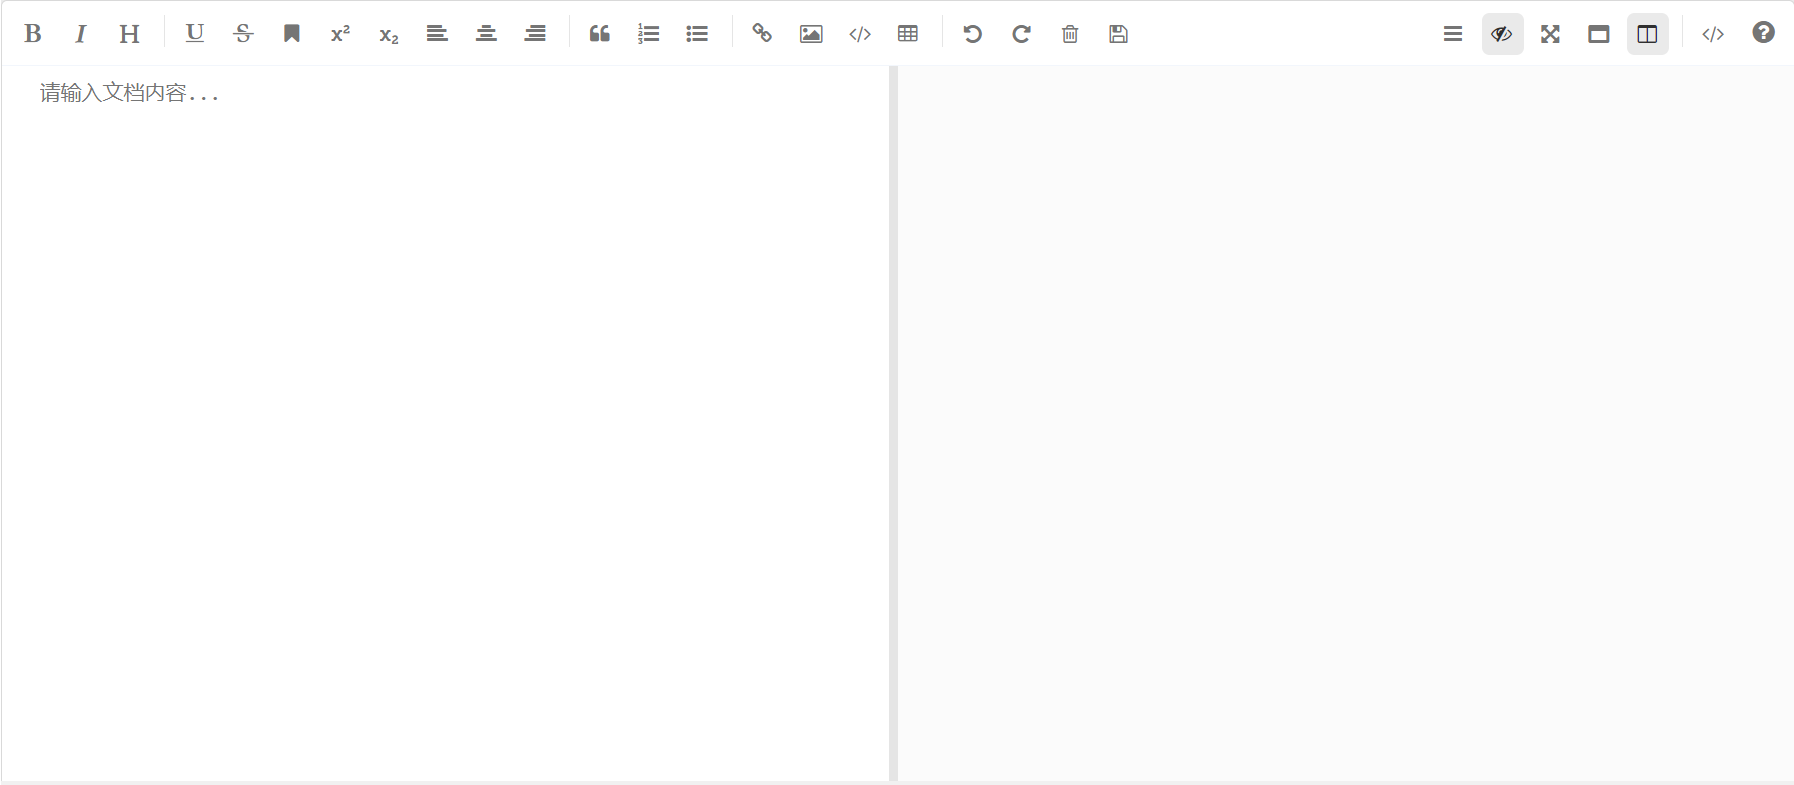
引入之后,我们就能够在页面中看到如下效果:

其中,常用参数的含义如下:
- placehodler:文档内容为空的时候在输入框中显示的内容
- boxShadow:是否展示阴影效果
- v-model=“content”:表示文档内容,文档内容与data中的数据content是动态双向绑定的
- toolbars:表示工具栏中需要显示的内容
经常用到的几个监听的事件:save事件,imgAdd事件和imgDel事件。save事件在点击保存按钮或者按下ctrl+s之后触发,imgAdd事件在点击图片上传之后触发,imgDel事件在点击图片按钮中的删除按钮后触发(手动删除文档内容中的引入图片代码不会触发)
通过引入mavon-editor可以完成前端修改网页内容后动态保存,具体思路如下:
首先网页的展示设置成动态的,一个网页的内容对应后端的一个md文件。网页展示之前向后端请求内容,后端读取对应的md文件内容,将其转化成html格式的字符串,然后将html字符串和md字符串传送给前端,其中html字符串通过v-html指令绑定,将内容展现出来,md字符串绑定到content中,可以展示在编辑器中。
在前端修改网页,只需要修改编辑器中的文档内容,通过动态绑定机制可以获取到当前的文档内容。之后监听保存事件,将当前文档内容传送给后端,后端保存到对应路径即可。
图片上传和删除
图片的上传和删除分别监听imgAdd和imgDel事件。
1. 图片上传
默认的图片上传事件会将本地图片放入文档内容中,但是在前后端分离的情况下,图片不会上传到服务器中。
于是需要监听imgAdd事件,将本地添加的图片上传到后端服务器当中。发起axios请求向后端上传图片,后端将图片保存在指定的目录下,然后返回图片访问的url,然后前端的mavon-editor通过调用img2url来完成代码的替换。代码如下:
1
2
3
4
5
6
7
8
9
10
11
12
13
14
15
16
17
18
19
20
21
22
23
24
25
26
27
28
29
30
31
|
handleImgAdd(pos, $file) {
let formData = new FormData();
formData.append('file', $file);
formData.append('path', 'img/' + this.$route.params.target);
this.$axios({
method: 'POST',
url: this.$store.state.backend_url + 'post/addImg',
data: formData
})
.then(response => {
let img_url = this.$store.state.backend_url + response.data.url;
this.$refs.md.$img2Url(pos, img_url);
this.$notify.success({
title: '',
message: '图片上传成功,此后不应手动修改已上传图片的名称',
duration: 2000,
})
})
.catch(error => {
console.log(error);
this.$notify.error({
title: '',
message: '图片上传失败',
duration: 2000,
})
})
},
|
其中上传的链接需要根据实际内容进行修改。
这里有一个问题,就是嵌入在md中的访问图片的方式是通过img标签,src属性来完成的,这种方式没有办法带上header,也就没有办法完成权限的验证。一种解决方法是这里可以让后端将图片保存到静态资源当中,即可以通过url直接访问得到(如flask的static),这样就可以通过img中的src得到图片。
2. 图片删除
图片删除监听imgDel事件,其中参数pos中可以获得图片的链接,通过pos[0]即可。获取到图片的链接后(具体来说获取到图片的名称即可),就可以向后端发送请求,后端再根据图片的路径进行删除。具体代码如下:
1
2
3
4
5
6
7
8
9
10
11
12
13
14
15
16
17
18
19
20
21
22
23
24
|
handleImgDel(pos) {
console.log(pos[0]);
this.$axios.post(this.$store.state.backend_url + 'post/deleteImg', {
img_url: pos[0]
})
.then(response => {
this.$notify.success({
title: '',
message: '删除成功',
duration: 2000,
})
})
.catch(error => {
console.log(error);
this.$notify.error({
title: '',
message: '后台删除失败,请查看是否更改了图片名称',
duration: 2000,
})
})
}
|
Nuxt与Markdown相关的工具插件
mavon-editor还具有Markdown回显的功能,这里没有用到所以就没有进行说明。
在资料收集的过程中,还发现了在nuxt中一些与Markdown相关的插件,这里做一个记录:
参考文章
- vue使用mavon-editor保存md到数据库,页面回显,二次编辑__小郑有点困了的博客-CSDN博客
- Nuxt引入mavon-editor插件实现markdown功能
- 雨点的名字 - 博客园 (cnblogs.com)
- mavon-editor
使用教程 - 简书 (jianshu.com)
